
I’ve had a couple of days were I haven’t had any (or very little) time to sew. Therefore it has been a while since my last uppdate.
But here we go again 
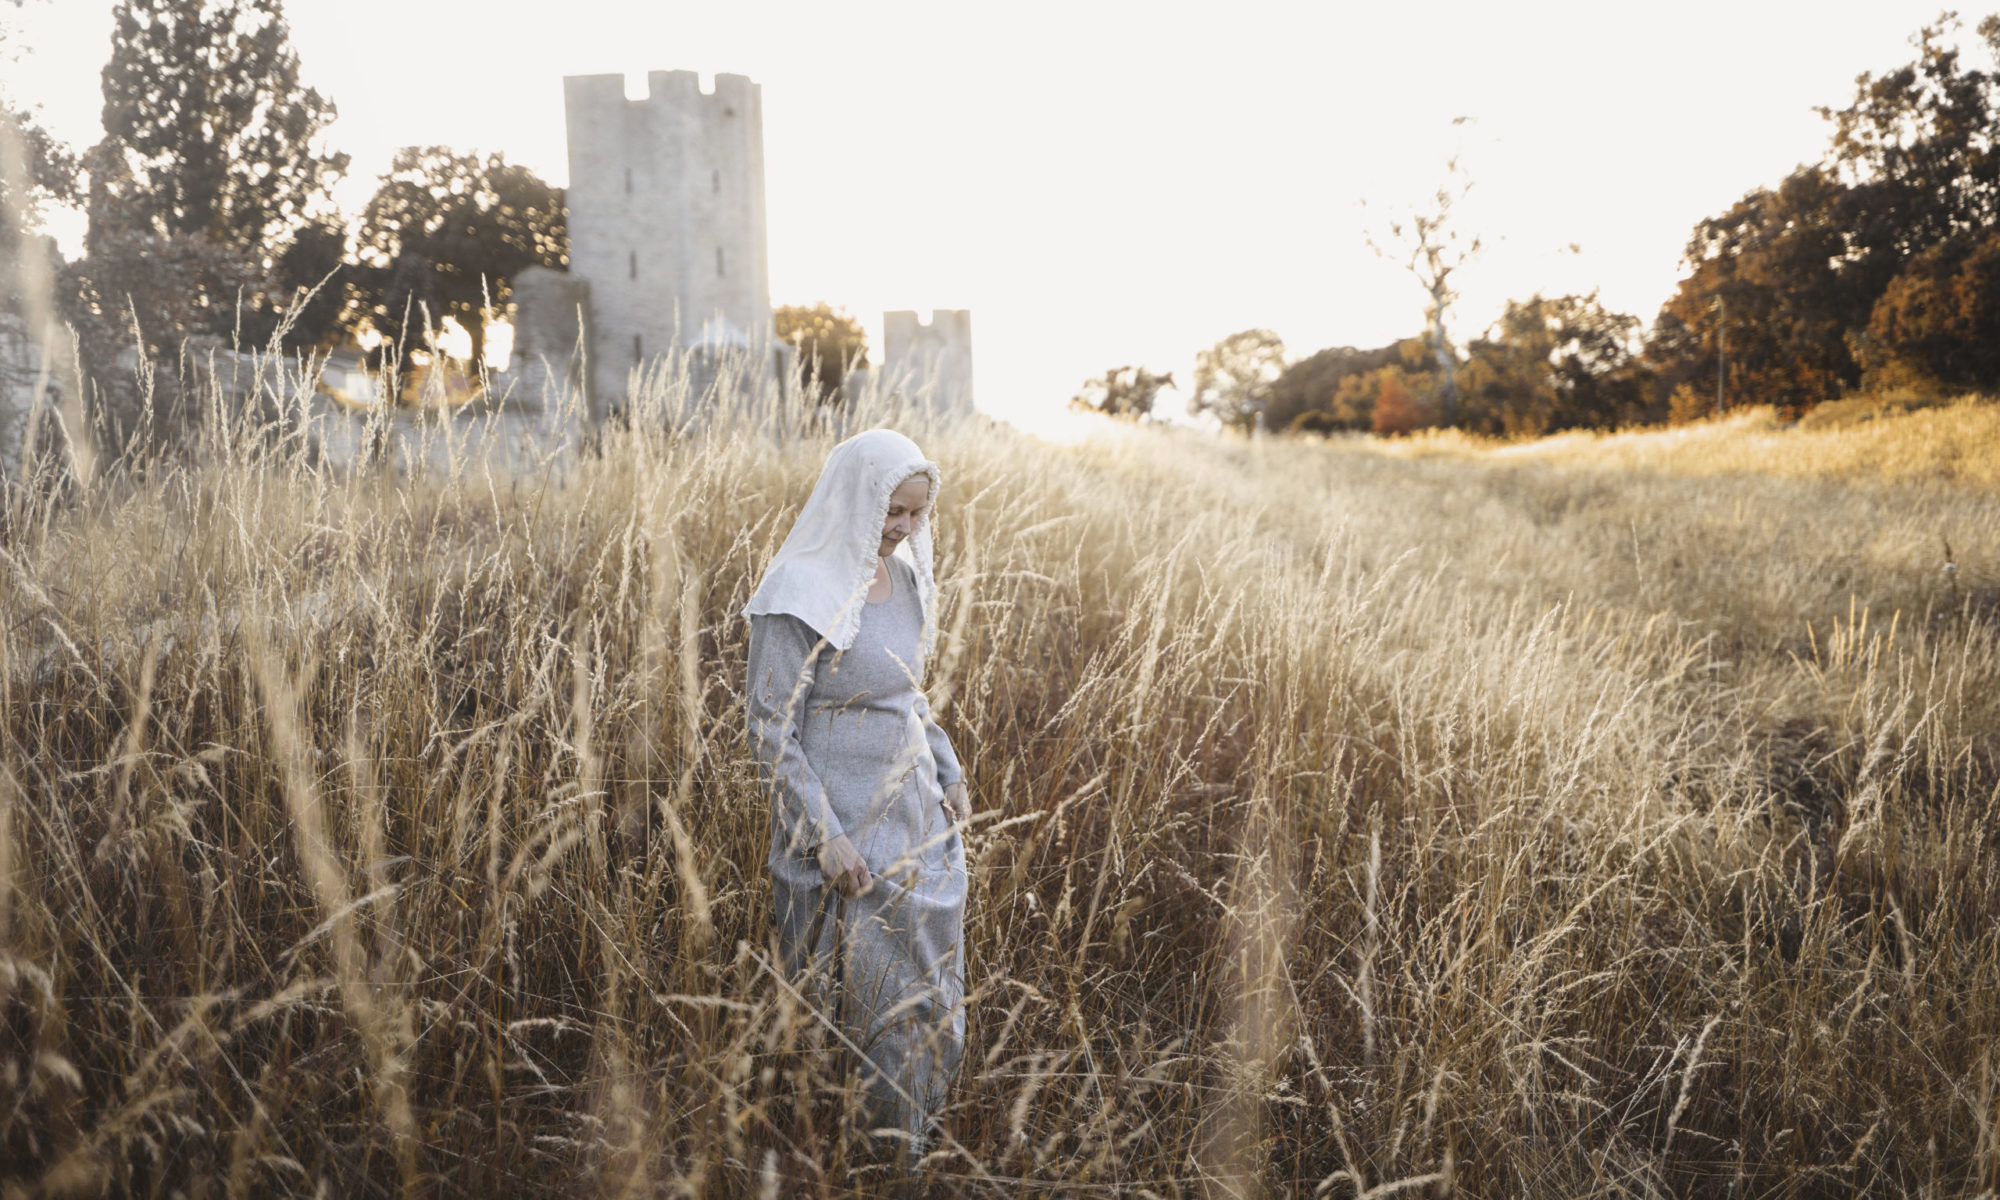
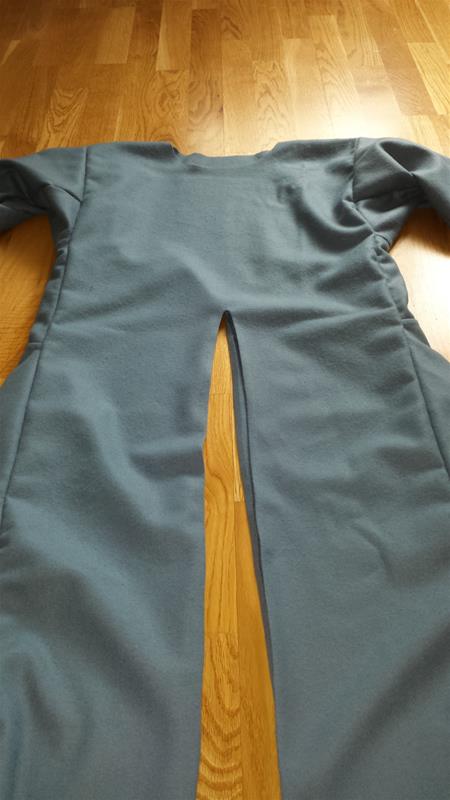
I have sewn the kirtle together with backstitches and we tried it on again. With a bulky T-shirt under it still seems a bit snug, but hopfully it will be better with the linnen shirt underneath (and it is only snug, not to small ).
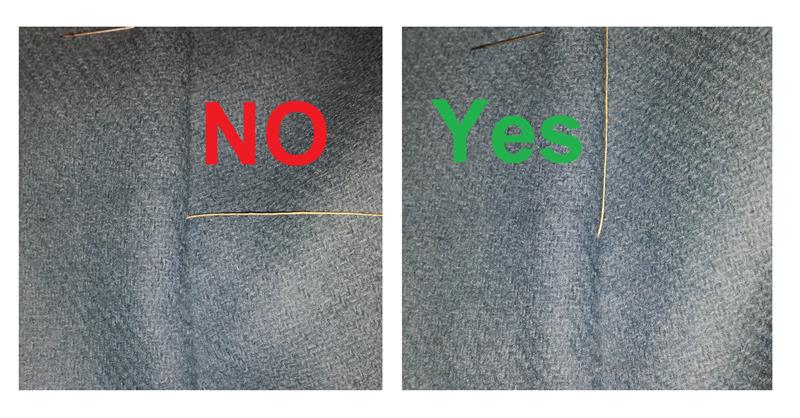
I’ve marked out where I want the gussets to start.
A big tip is to do so with a piece of string. Or a safteypin.
A needle can fall out when you take the kirtle of and then you have to start over again with the messuring.
* * * * * * * * * * * * * * * * * * * * * *
Jag har haft några dagar nu med ingen (eller väldigt lite) sytid. Därför var det ett litet tag sedan jag uppdaterade bloggen.
Men nu så
Jag har sytt ihop kjorteln med efterstygn och vi har provat den igen. Med en lite för stor T-shirt under så känns den fortfarande lite tight, men förhoppningsvis blir det bättre med linneskjortan under. (och den är bara tight, inte för liten ).
Jag har märkt ut vart kilen ska börja.
Ett stort tips är att göra detta me en bit snöre/tråd eller en säkerhetsnål.
En knappnål kan ramla ut när du tar av dig kjorteln och då måste du ju börja om igen med att mäta ut.
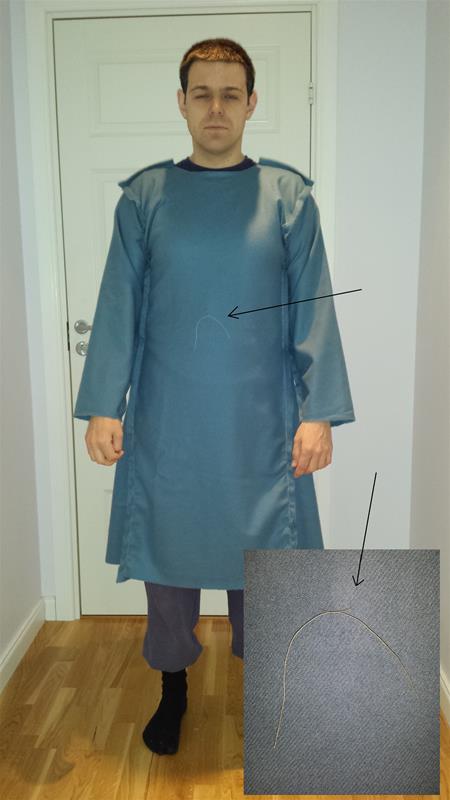
Then I messure were the middle are (I usually just fold the fabric at the bottom) cut a short slit then tear the fabric right up to the mark i´ve made.
Here I have put the fabric with the tear on the ironing board. Right side faceing down.
* * * * * * * * * * * * * * * * * * * * * *
Sen mäter jag upp var mitten är (jag brukar bara vika tyget i nederkant) och sen klippa ett kort snitt så jag kan riva tyget hela vägen upp till markeringen.
På bilden här har jag lagt tyget med den upprivna slitsen på strykbrädan. Rätsidan neråt.
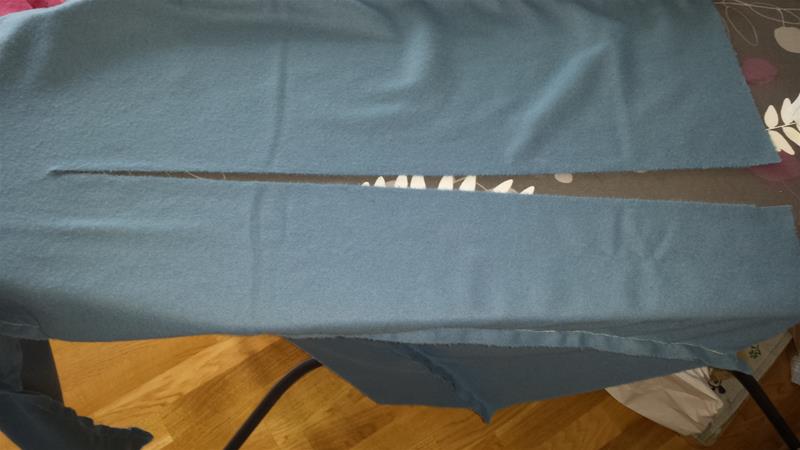
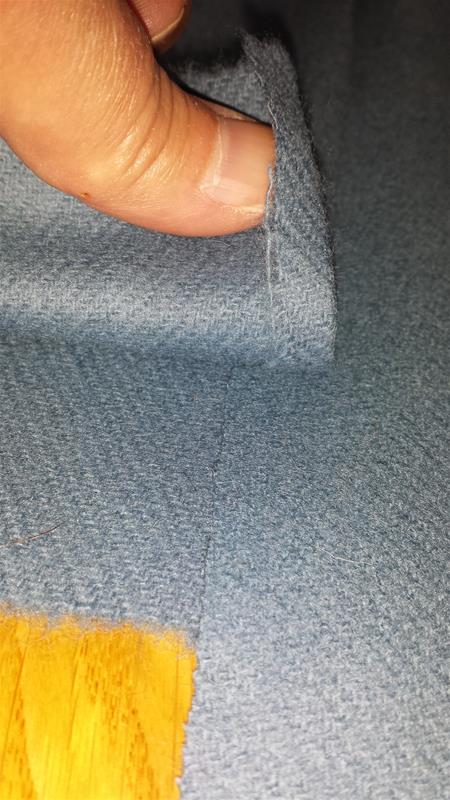
Then it is time to use the iron. We are going to fold the seam allowance in and press it with a hot iron to make a sharp pleat. You want the seam allowance to be about 5 to 8 mm wide from the bottom, and as long as you can maintain that with.
Then taper it of to the end.
If you havn’t read the part on material care – it is time to do that now. 
* * * * * * * * * * * * * * * * * * * * * *
Sen är det dags att stryka. Vi ska vika ut sömsmånen och pressa den med ett varmt strykjärn för att göra ett skarpt veck. Du vill att sömsmånen ska vara mellan 5-8 mm brett från nederkant och så länge du kan hålla den vidden.
Sen smalnar man av på slutet.
Och om du inte läst delen om materialvård så är det dags att göra det nu
On the picture above you can se how it looks after beeing pressed.
I did both front and back slit at the same time, but you can do one at a time if you want.
Put your kirtle on a flat surface, this time with the right side out.
* * * * * * * * * * * * * * * * * * * * * *
På bilden ovan så kan du se hur det ser ut efter att ha pressats.
Jag gjorde både främre och bakre slitsen samtidigt, men du kan göra en i taget om du vill.
Lägg kjorteln på en platt yta sen, den här gången rättvänd
Take your last whole gusset and put it underneath the top layer and match it up to one side. As you se, my gusset is a bit longer than the kirtle.
Well that is because i need to trim the gusset later on so it has a bit of a curve, so if I leave it a bit longer, I don’t have to take any lenght of the kirtle.
* * * * * * * * * * * * * * * * * * * * * *
Ta din sista hela kil och lägg den under det översta lagret. Matcha längden med ena sidan av öppningen. Som du ser så är min kil lite längre än kjorteln.
Det är för att jag måste trimma kilarna så att dom har en lätt rundad form senare. Så om jag låter kilen vara lite längre än kjorteln så behöver jag antagligen inte trimma av något på kjortelns längd.
A close up of how much the kirtle should overlap the gusset.
Pin them together and then it is time to sew.
This time from the right side of the fabrick.
* * * * * * * * * * * * * * * * * * * * * *
En närbild på hur mycket kjorteln ska överlappa kilen.
Nåla ihop och sen är det dags att börja sy.
Denna gång syr vi från rätsidan.
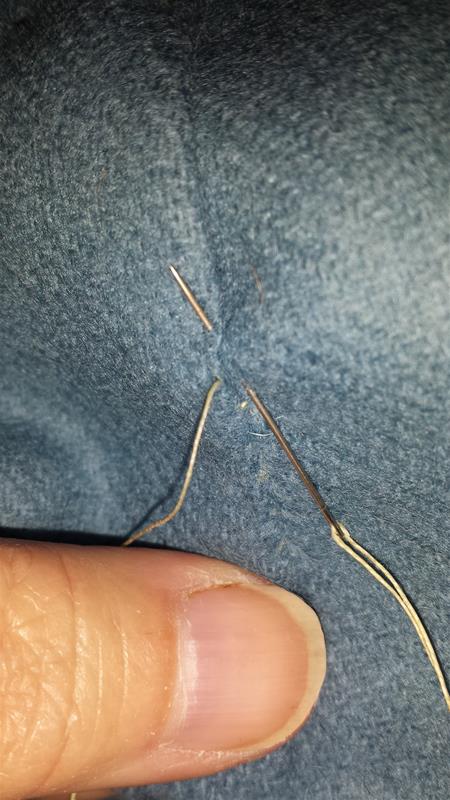
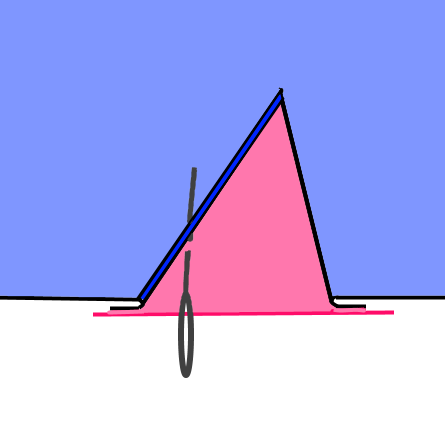
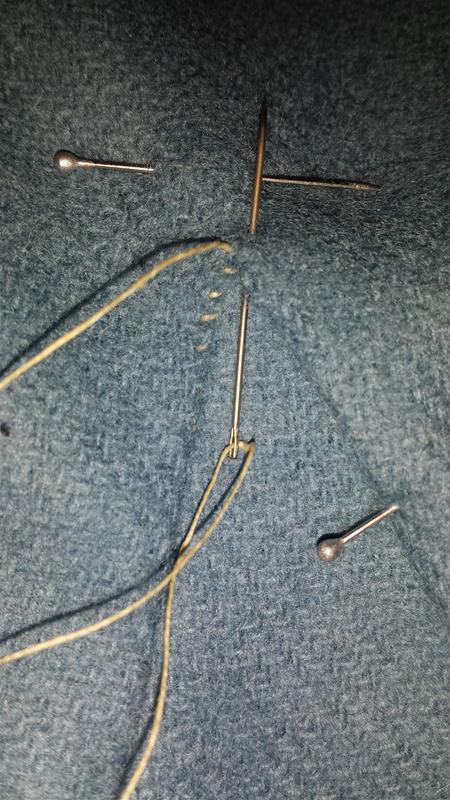
This is how you sew this.
You put the needle in the gusset just below where the needle exited the kirtle.
Make a small stitch in the gussetfabric, then put the needle trough the kirtle edge, so close to the ege you can. One thread is all you need to catch.
* * * * * * * * * * * * * * * * * * * * * *
Så här syr du.
Du sätter nålen genom kilen rakt under där du kom upp i kjorteltyget.
Ta ett kort stygn i kilen och gå sen upp med nålen i kanten av kjorteln så nära kanten du kan komma. En tråd är allt du behöver fånga i kanten.
When you want to tighten theese stitches you should pull the thread in the direction you are sewing.
Hold on to the fabric behind the stitches and pull the thread forward.
If you pull to the side it is a higher risk of pulling the fabric together as well, wich will end up as small wrinkles.
* * * * * * * * * * * * * * * * * * * * * *
När du vill dra åt stygnen så ska du dra tråden i samma riktning du syr.
Håll i tyget bakom stygnen och dra tråden framåt.
Om du drar åt sidan så är det större chans att du drar ihop tyget samtidigt och du kommer i så fall få små rynkor i tyget.
When you reach the tip of the gusset, you need to make the sitches a bit bigger. I don’t mind that they show at this point, but I try to put the needle in under the top layer when I make the stitches so I can pull the stich a bit tighter around the edge.
När du når änden så måste du ta lite större stygn. Jag personligen tycker inte att det gör något om stygnen syns här, men jag försöker ändå sätta i nålen lite under det övre lagret när jag syr, bara för att kunna dra åt stygnen lite mer runt kanten.
* * * * * * * * * * * * * * * * * * * * * *
* * * * * * * * * * * * * * * * * * * * * *
The back gusset / the devided gusset.
Well, just stitch it together and sew it in place like the front one.
I usually like to sew down the seam allowence befor i put the gusset in. But you can do that later if you wish.
Sewing down the seam allowance will be the next post if you don’t now how to do that.
* * * * * * * * * * * * * * * * * * * * * *
Bakre kilen / den delade.
Tja det är bara att sy ihop den och sen sy fast den på samma sätt som den främre kilen.
Jag brukar fälla sömmarna innan jag syr fast, men det är en smaksak. Det går att göra senare också.
Att fälla sömmar kommer jag ta upp i nästa post ifall du inte redan vet hur man gör.