Start basting the pieces together so you can check the size and fit.
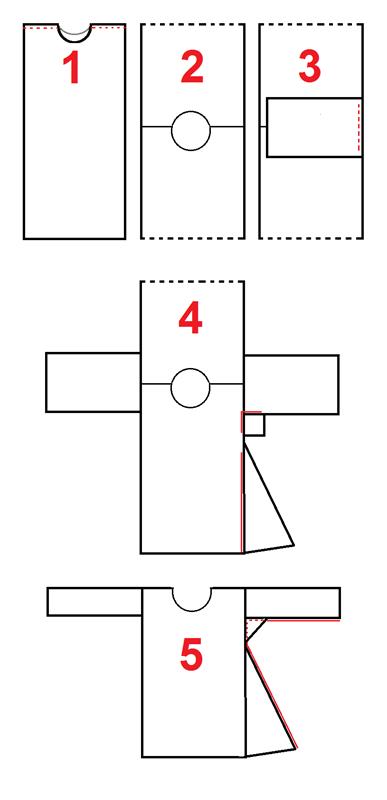
1 – First baste the shoulder seams (right side of the fabric together).
Ok I haven’t told you about how to make the hole for the head. But… well… at this stage it should be very snug. It’s better to not baste the shoulder seams all the way to the neckline, and have a hole that is exactly the size of the head or a tiny bit smaller, than end up with a hole that is way to big.
2 – Place the pieces right side up on a flat surface.
3 – Baste the sleeve (right sides together as always) but make sure not to sew all the way to the end. Leave the sew allowance unstitched.
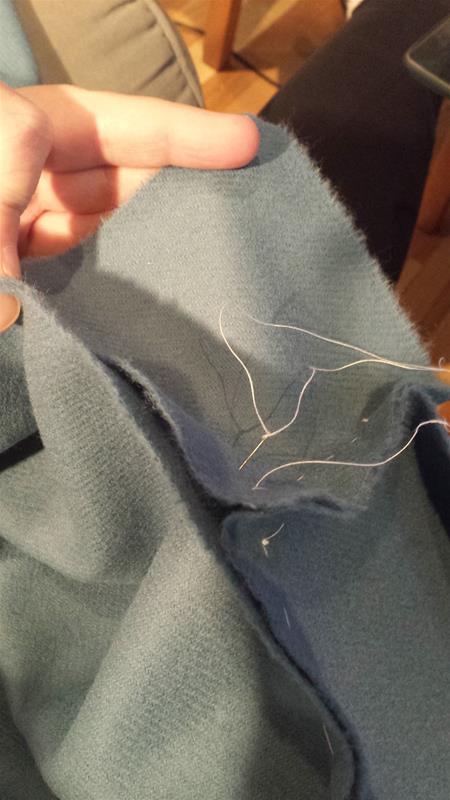
4 – This picture shows the placement of the gussets. This can feel a bit tricky, but put the armpit-gusset seam allowance to seam allowance with the end of the sleeve (see the photo below the paint image) and baste it into place. Remember not to sew over the seam allowence of the gusset. Then turn it a bit and start from the point where the gusset meets the sleeve and start basting the other side of the gusset so it is basted in two sides – as picture nr 4.
The side gusset also is basted into place. Here it is quite right if the gusset is about 2 cm longer then the front/back panel when the tip of it sits about two fingers with over the waistline. And remember not to sew over the sew allowance in the tip of the gusset…
5 – Fold your kirtle at the shoulder seams (right sides together). And then start to baste the sleeve from the end to the armpit gusset. Fold the gusset in place and baste al the way through the hemline – catching the side gusset on the way.
* * * * * * * * * * * * * * * * * * * * * *
Börja med att tråckla ihop bitarna så du kan testa passformen och storleken.
1 – Börja med axelsömmarna – rätsidorna på tyget mot varandra.
Ok jag har inte berättat hur du ska göra hålet för huvudet. Men tja… I det här fallet ska det vara väldigt tight.
Det är bättre att inte tråckla ihop axelsömmarna hela vägen till halshålet än att du står med ett för stort halshål efter att ha fållat det. Omkretsen på huvudet eller nästan aningen mindre är lagom här och nu.
2 – Lägg delarna med rätsidan uppåt på en plan yta.
3 – Lägg ärmen med rätsidan nedåt ovanpå fram/bakstycket. Tråckla fast, men se till att inte tråckla hela vägen ut till kanten. Lämna bredden du har valt för sömsmån otråcklad.
4 – Den här bilden visar placeringen av kilarna. Speciellt ärmspjället kan vara lite trixigt att få till första gången.
Men om du lägger den sömsmån mot sömsmån med ärmen (se fotografiet längre ner) och tråcklar fast i den positionen och sedan vinklar upp det så det ser ut som i bild 4 och tråcklar fast andra sidan så är du på rätt väg. Även här bör du komma ihåg att inte tråckla ända ut till kanten, lämna en sömsmånsbredd.
Tråckla även fast sidokilen. Här är det bra om den hamnar ca 2 cm längre ner än fram/bakstycket när spetsen på kilen är ca 2 fingerbredder ovanför midjelinjen. Kom ihåg att inte tråckla fast hela vägen igenom spetsen på kilen, lämna en sömsmån där med.
5 – Vik ihop kjorteln i axelsömmarna (rätsidorna mot varandra) och börja sen tråckla från änden av ärmen (vid handleden) och upp mot ärmspjället. Vik in ärmspjället som på bilden så kommer nog bitarna att falla på plats.
Fortsätt tråckla hela vägen ner mot fållen genom andra sidan av kilen.
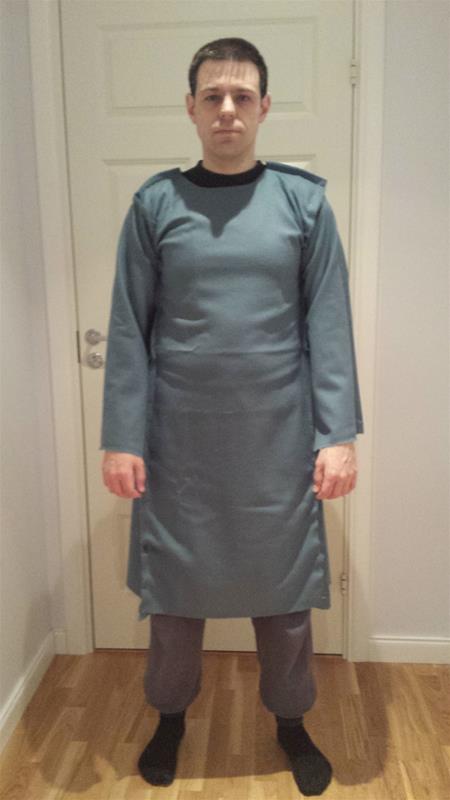
When you basted the kirtle together, it is time to try it on.
You probably have noticed that we haven’t put the front and back gussets in yet. Well, there is no hurry, we can do that later. So if it is tight around the hips, there is no need to worry. You will have a few cm more when the gussets is fitted.
At this point I realised that I had made a misstake when I measured my husband. A year ago he were wider at the shoulders then around the chest and waist. But… well… That was a year ago, and he really loves my cookiing 
So how can I fix this?
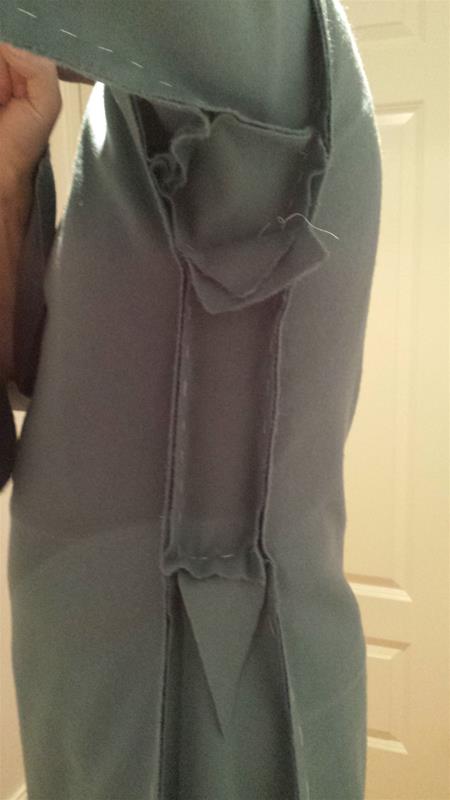
I put a strip of fabric in each side, wich means that I needed to square of the tip of the side gusset and the armpit gusset.
At the second fitting, I realised that I needed bigger armpitgussets, but otherwise it worked out just fine 
* * * * * * * * * * * * * * * * * * * * * *
När du har tråcklat ihop kjorteln så är det dags att prova.
Du har troligtvis sett att jag inte har satt i kilarna fram och bak än. Nå, ingen panik än. Det är något som man kan göra senare. Men om det är lite tight över höfterna just nu så är det alltså ingen panik.
När jag hade kommit hit så insåg jag att jag hade gjort ett misstag när jag mätte min make. Han har alltid varit bredare över axlarna än runt bröstkorg och midja. Men det var ett år sedan, och jag får nog försöka laga lite mindre god mat i fortsättningen
Men hur löser man det problemet?
Jo jag satte en remsa med tyg i sidan, vilket då innebar att jag fick ”ta bort” spetsen på kilarna.
Vid andra provningen såg jag att jag även behövde större ärmspjäll, men annars funkade min lösning riktigt bra
It looks a bit snug, but it is not as tight around the chest as it seems. Just bigger armpit gussets and then the problem is solved.
* * * * * * * * * * * * * * * * * * * * * *
Den ser lite tight ut, men den är inte så tight runt bröstkorgen som det ser ut. Lite större ärmspjäll och så är problemet löst.