

Finally…
I´ve been stuck with a couple of other items I needed to sew, but now I’m on the right track again 
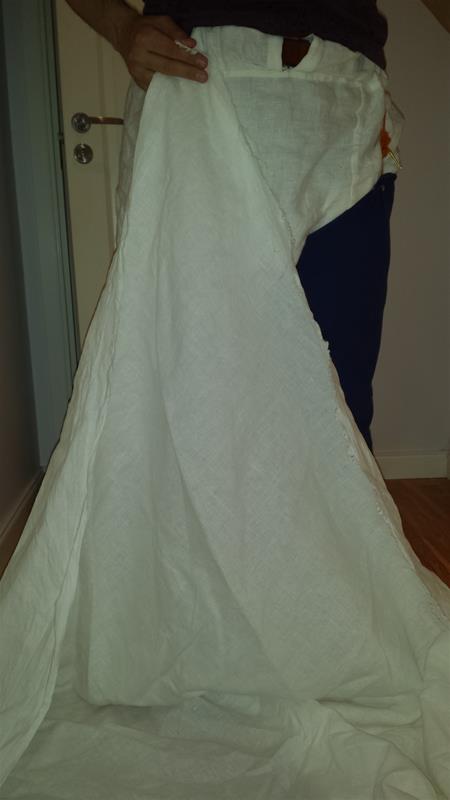
If you like to have the well fitted hose you can see in the manuscripts, then you need to make a toile.
Take an old sheet or other wowen fabric.
For my husbands hose I used a fullsize old sheet and started by letting him hold the corner of the sheet in the hight he wanted to have his hose.
* * * * * * * * * * * * * * * * * * * * * *
Äntligen…
Jag har fastnat med lite annan sömnad men nu är jag på rätt spår igen
Om du vill ha dom välsittande hosor som du kan se på manuskriptbilderna så måste du göra en toile.
Ta ett gammalt lakan eller något annat vävt tyg.
För makens hosor använde jag ett fullstort gammalt lakan och började genom att låta honom hålla hörnet av lakanet i den höjd han ville att hosorna skulle vara.
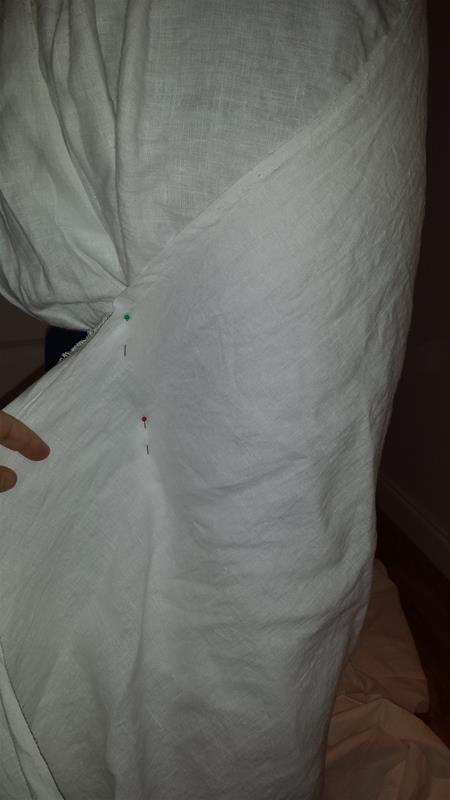
Then I pull the fabric to the back of the leg, while he is still holding on to the corner of the sheet, and start pinning it as smooth and tight as I can get it.
I found it easier to make a good toile if you have the right kind of underweare so therefore he has the braies on.
* * * * * * * * * * * * * * * * * * * * * *
Jag drar tyget mot baksidan av benet medan han fortfarande håller i hörnet på lakanet och börjar nåla det så slätt och tight som jag kan få det.
Jag har märkt att det är lättare att få en bra toile om man har rätt underkläder så därför har han sina brokor på sig.
About here… I remembered that I already had a toile, so i switched to that one (no need to cut up any more fabric then you need to )
When you have pinned all way down you can either say that you are happy with it, mark out where the pins are on both sides (both front and back of the pins. Where you are going to sew later on) and trim off the excess fabric. Or you can take a needle and thread and tack it togeather so that the one in the toile can test it out without being pricked by the pins, can he sit, walk and so on?
I recommend the latter.
My pattern goes all the way down under the heel so it is much simpler to tack it together with needle and thread around the heel.
* * * * * * * * * * * * * * * * * * * * * *
Ungefär här… kom jag på att jag redan hade en toile, så jag bytte till den (onödigt att klippa upp mer tyg än man måste )
När du har nålat hela vägen ner så kan du antingen säga att du är nöjd med det, märka ut vart nålarna är på båda sidor (alltså båda sidorna där du ser nålar och där du senare kommer sy) och klippa bort överflödigt tyg. Eller så kan du ta nål och tråd och tråckla ihop det så att den som är i toilen kan testa att sätta sig, gå osv utan att sticka sig på nålarna, kan han röra sig i den?
Jag rekommenderar att man tråcklar om man inte är helt säker på att det här kommer funka.
Mitt mönster går hela vägen ner under hälen och det är så mycket lättare att tråckla den biten än att nåla.
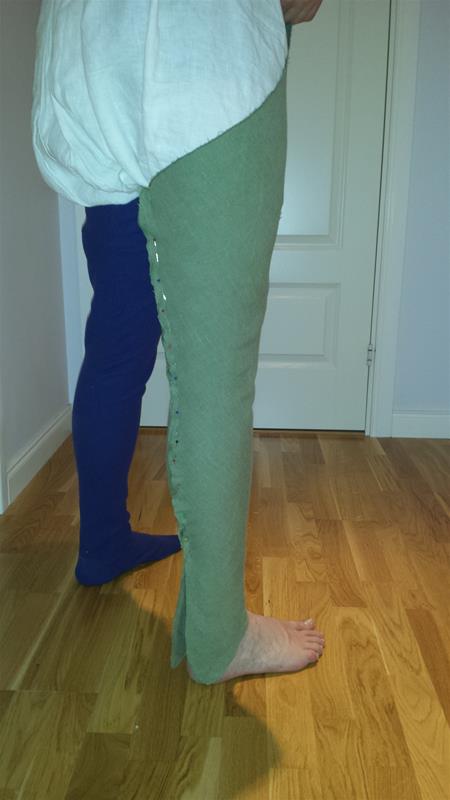
Since this is the old pattern for the blue hose on the other leg, I know that it fits, so I didn’t pin it around the heel, but I tried to show how it will curv around it.
When you are happy with the fit and how you can move in it, it is time to cut out the fabric.
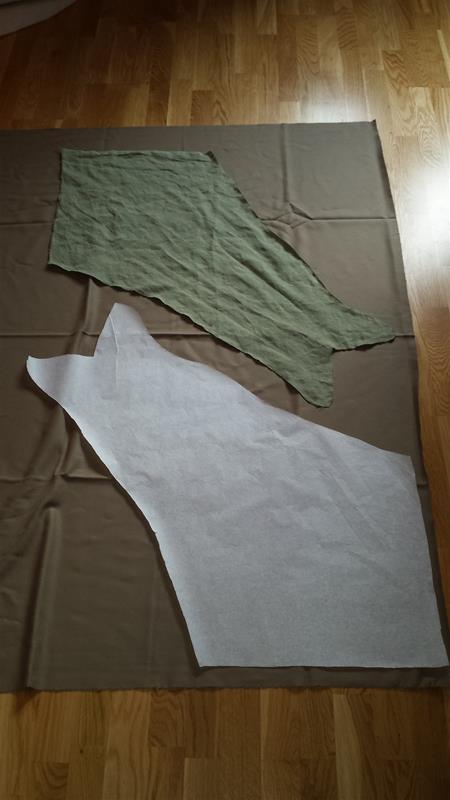
For my husband I only do one toile for one leg and use for both. But for my knee high hose I need to make a toile for each leg since my legs aren’t the same shape. So if you have one knee that is thicker or one calf or… Well do a toile for each one. It doesn’t take that long to do, but it will look much nicer.
As I don’t have two patterns here, I made a copy in a cheap paper for patternmaking. That helps in positioning the legs on the fabric.
You want to go across the grain of the fabric with the front center of the hose. This will make the fabric a bit stretchy.
Notice that I haven’t made any toile for the foot, and I won’t do it later. I’ll show you how I do it and then you can decide if you want to do a mockup or do it on the fly as I do 
* * * * * * * * * * * * * * * * * * * * * *
Eftersom det här är det gamla mönstret för den blåa hosan på andra benet så vet jag ju att det passar så jag nålade inte fast den runt hälen, men jag försökte visa hur tyget kommer böja sig runt.
När du är nöjd med passformen och hur det går att röra sig i det så är det dags att klippa ut tyget.
Till maken gör jag bara en toile för ena benet och använder det som mall för båda. Men för mina knähöga hosor behöver jag göra två toiler, en för varje ben eftersom mina ben inte har samma form. Så om du har ett knä som är tjockare än det andra eller om du har en tjockare vad så gör två toiler, det tar inte så mycket längre tid att göra men det kommer se mycket bättre ut när det är klart.
Eftersom jag inte hade två tolier här att lägga på tyget så gjorde jag en kopia i billigt mönsterpapper. Det hjälper när man ska positionera mönstret på tyget.
Du ska lägga ut delarna på skrå (dvs diagonalt över trådriktningen) för att få ut så mycket stretch som möjligt.
Och som du nog har sett så har jag inte gjort en toile för fotdelen, vilket jag inte kommer göra heller.
Jag kommer visa hur jag gör längre fram, så kan du själv bestämma om du vill göra en testbit eller köra direkt som jag gör
Remember…
Don’t forget the seam allowance when you cut it out.
* * * * * * * * * * * * * * * * * * * * * *
Glöm inte sömsmånen nu när du klipper ut delarna.