

Now we have come to the part where you need to make the foot-piece.
This can be done in a couple of ways. For those who doesnt want a seam under the foot, you can drape a piece of fabric on the foot and stitch it onto the leg-piece. And then make a sole for the hose and stitch together.
But I don´t mind a seam under the sole of the fot, for me it would rather be quite agonising to have a seam on the outside of my foot, since one of my feet has been sliced open on the side three times due to surgery.
When I sew down the seam allowance on the hose, I do it as smooth as I can, and I also make a wider seam allowance under the foot than usual. I think that it makes it almost unnoticeable.
You can make the seam allowance as wide as the foot if you want. In that case you practically got an extra sole. 
* * * * * * * * * * * * * * * * * * * * * *
Nu har vi kommit till den del då foten ska täckas.
Det här kan man göra på flera olika sätt. För er som inte vill ha en söm under foten så kan ni drapera ett tygstycke över foten och sy fast mot bendelen. Sen gör ni en sula och syr ihop alltihop.
Jag tycker inte att sömmen under foten stör något dock. För mig skulle det snarare bli rätt plågsamt att ha en söm på sidan av foten eftersom min ena fot har blivit uppskuren där tre gånger pga operationer.
När jag syr ner sömsmånen på hosor så försöker jag alltid göra det så plant som möjligt och under foten försöker jag dessutom göra sömsmånen bredare och då tycker jag att den knappt känns.
Sömsmånen kan du göra så bred du vill, den kan täcka hela vidden av foten. På så sätt får du praktiskt taget en exta sula.
* * * * * * * * * * * * * * * * * * * * * *
* * * * * * * * * * * * * * * * * * * * * *
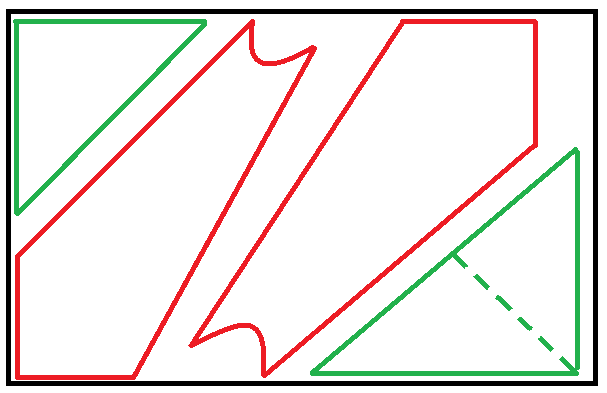
When you put your pattern on the fabric you probably noticed that you got two big cornerpieces left over.
Now you are going to use one (or two, depending on how big the pieces are and how big the feet are).
* * * * * * * * * * * * * * * * * * * * * *
När du la på mönsterdelarna på tyget så märkte du antagligen att du fick två stora hörnbitar över.
Nu ska du använda en av dom (eller båda, beroende på hur stora bitarna är och hur stor foten är).
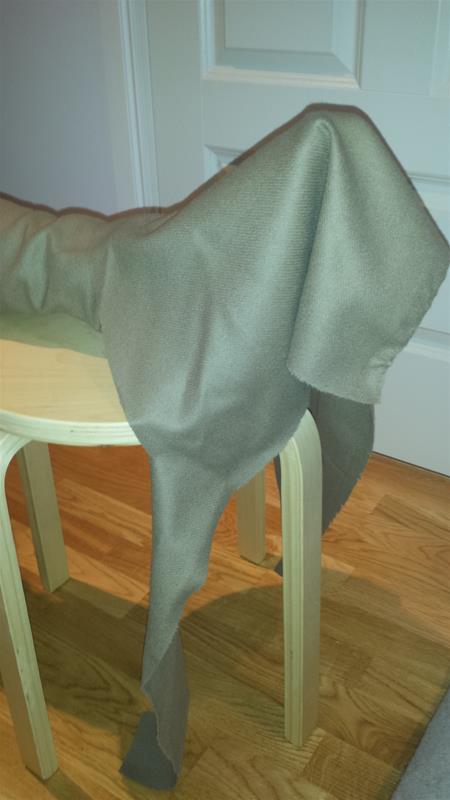
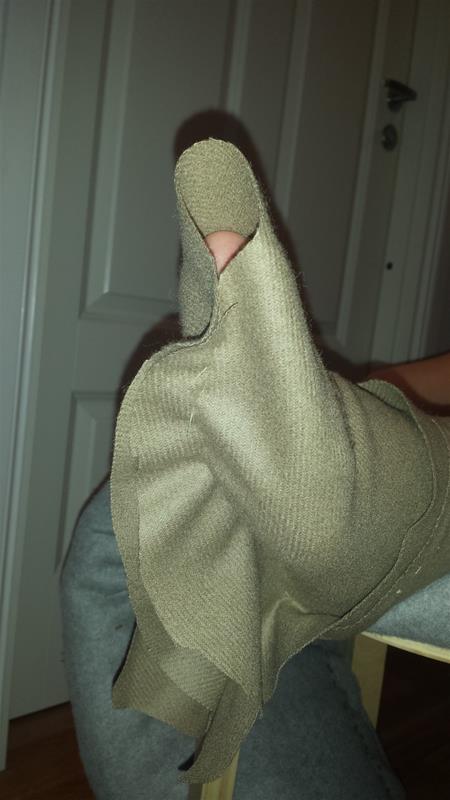
Start by putting the leg of the hose on and make sure it has the seam were it is supposed to be (center back of the leg and down around the heel.
Then drape the triangle piece around the foot with the straight corner pointing away from you (or the one wearing the hose) . Make sure that you have enough fabric under the toes that you can cover it from the sides.
* * * * * * * * * * * * * * * * * * * * * *
Börja med att ta på hosbenet och kontrollera att sömmen är centrerad bak och ner runt hälen.
Drapera sedan triangeln över foten med 90-graders-hörnet pekandes bort från dig (eller från den som har hosan på sig). Kontrollera att det finns tyg så det räcker till att täcka under tårna när du viker in tyget från sidorna
Start tacking the cornerpiece of the fabric on to the leg-piece. Usually you have to do this two times since it is hard to get the fabric smooth over the foot at once.
* * * * * * * * * * * * * * * * * * * * * *
Börja med att tråckla fast hörndelen av tyget mot ben-delen. Vanligtvis får man göra det här två gånger eftersom det är svårt att få tyget slätt över foten på en gång.
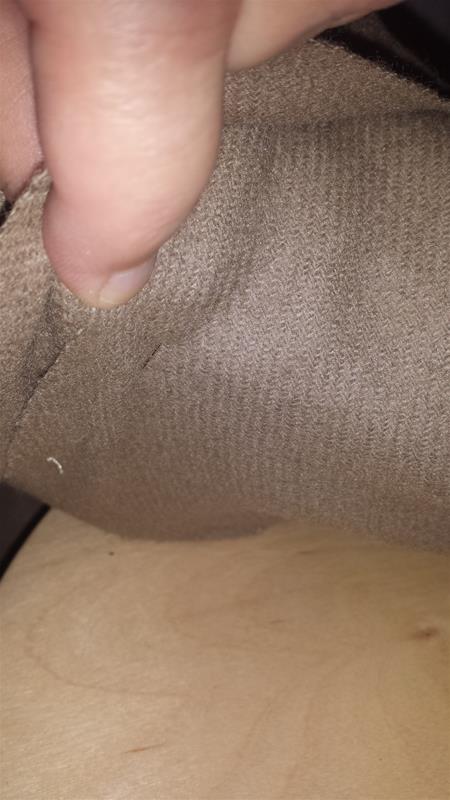
I am starting under the foot and working my way around.
* * * * * * * * * * * * * * * * * * * * * *
Jag börjar under foten och arbetar mig runt.
When I have tacked the cornerpiece on to the leg-piece you can (if you want) trim the fabric down a bit.
Don´t take to much.
Check if you need to make corrections to the seam you just made right now (if it is wery croocked or anything else that is obviously ”off”).
Then you can start tack it under the foot. Either from the heal to the toes or the other way. Line it up with the seam that you have under the heel. Make sure that the fabric lays smooth around the foot.
* * * * * * * * * * * * * * * * * * * * * *
När du har tråcklat fast hörndelen mot bendelen så kan du (om du vill) trimma ner tyget lite.
Men ta inte för mycket.
Kolla om du redan nu måste göra ändringar till tråckelsömmen (om det är väldigt snett eller annat som är uppenbart ”fel”).
Sen kan du börja tråckla under foten. Spelar ingen roll om du går från häl till tå eller tvärt om bara du får sömmarna att mötas bak vid hälen. Var noga med att tyget ligger slätt runt foten.
Check the fit again between the fot and the leg-part. Adjust if you need to.
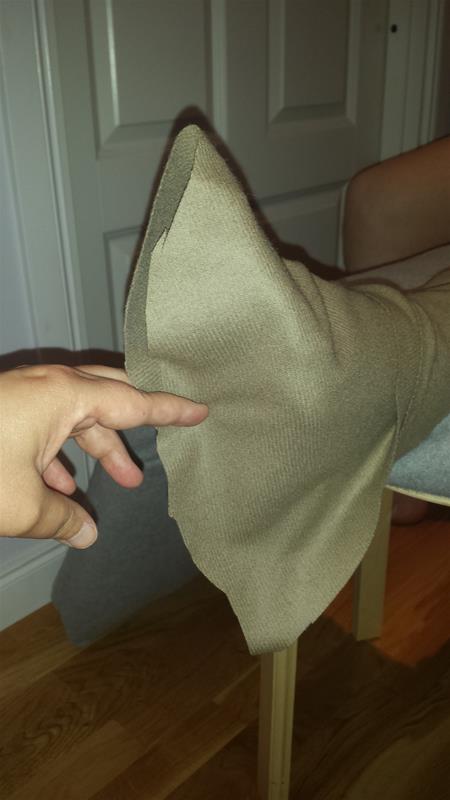
Then sew around the toes, quite close but with wiggleroom.
* * * * * * * * * * * * * * * * * * * * * *
Kolla passformen mellan fot och bendel igen och anpassa om det behövs.
Sen tråckla runt tårna. Rätt tight men med rörelsemån.
* * * * * * * * * * * * * * * * * * * * * *
* * * * * * * * * * * * * * * * * * * * * *
I just realised that I missed the picture of how i tacked in front of the toes. And I don’t have the picture left.
But just follow the curve of the toes, about 2 mm in front of them and it will be ok.
* * * * * * * * * * * * * * * * * * * * * *
Jag insåg precis att jag har missat bilden på hur jag tråcklade framför tårna. Och jag har inte bilden kvar.
Men följ kurvan som tårna bildar och tråckla ca 2 mm framför tårna så blir det bra.